



October 16, 2026
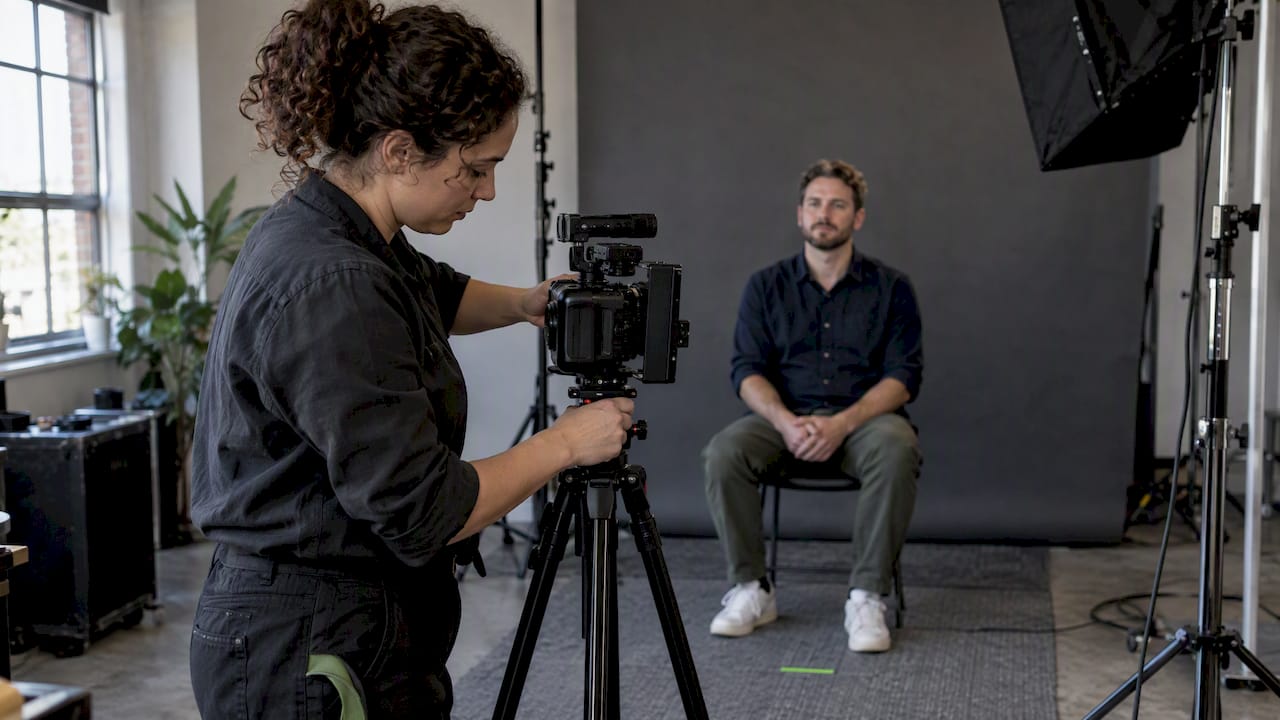
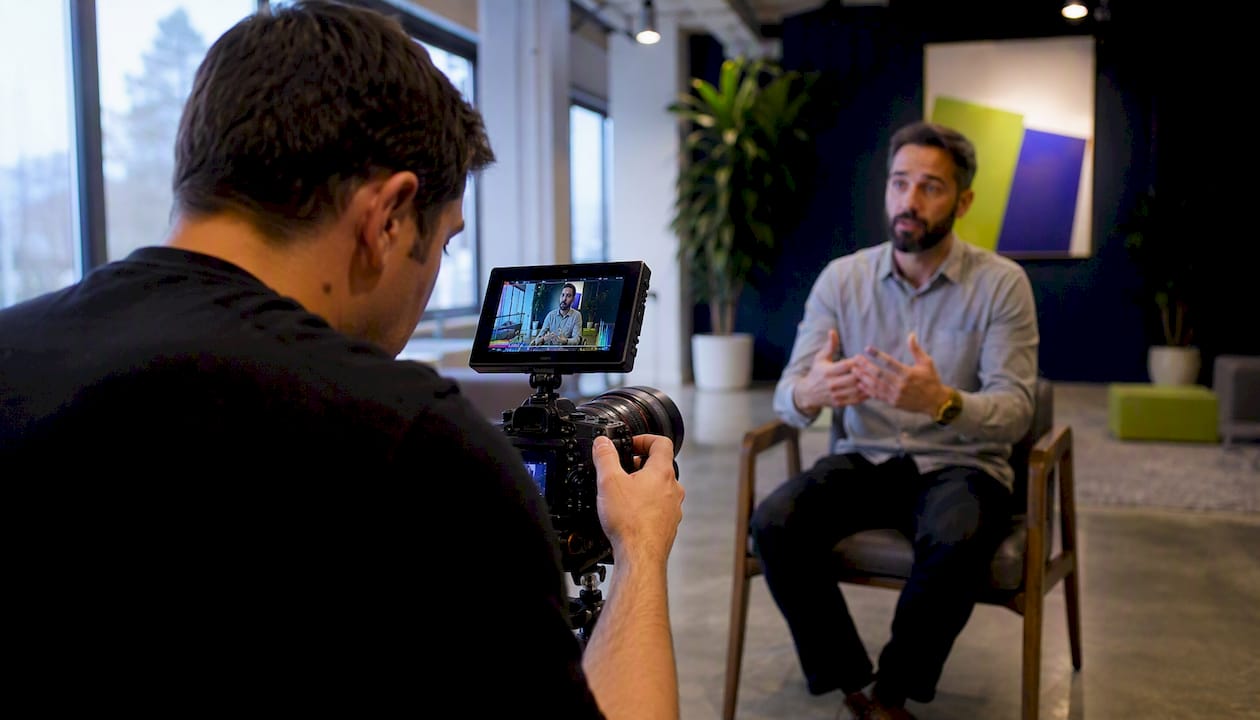

Commercial photography is any image created for business use — to sell, promote, or position a product, service, or brand. If you’re an aspiring photographer, your next step is to build a small, focused portfolio project in one niche (product, food, or headshots) before you pitch a single client. If you’re a business owner or marketing manager, start by writing a one-page creative brief that lists your goals, distribution channels, and intended usage before you contact anyone.
Three quick examples show how this plays out in practice:
- Pack shot for e-commerce: A clean, white-background image of a skincare bottle used on a product listing page to drive add-to-cart clicks.
- Lifestyle hero for paid social: A model using a fitness product in a natural setting, sized for Instagram and Facebook ads to build brand desire.
- Campaign image for a seasonal ad: A styled flat lay of holiday gift products used across print inserts and email headers for a Q4 promotion.
Each of those images was made with a specific business outcome in mind — that’s what separates commercial work from personal or editorial photography.
Key Takeaways
Commercial photography is any image made for business use, and pricing it correctly requires separating the creative fee, production costs, and usage/licensing into three distinct line items.
US day rates vary widelyCommercial creative fees typically run $800–$5,000 per day; beginners commonly start at $25–$75 per hour.Prioritize image types by channelPack shots serve listings; lifestyle images drive social conversion; detail shots answer tactile questions for online shoppers.Idea Stream Marketing combines production and distributionThe agency handles commercial photography, post-production, and digital marketing together for Long Island and nationwide clients.
| Point | Details |
|---|---|
| Define usage before you quote | Territory, duration, media type, and exclusivity determine licensing fees — never bundle them into the creative fee. |
| Contracts protect both sides | Every job needs a written agreement covering scope, image count, usage terms, and copyright ownership. |
Table of Contents
- What is commercial photography, and what are its main types?
- How do businesses actually use commercial images?
- How do you break into commercial photography as a beginner?
- What should your commercial photography portfolio include?
- How do you prepare for a commercial shoot?
- What does a well-run shoot day look like?
- What happens after the shoot? Post-production and delivery
- How do you price commercial photography, and what does licensing cost?
- What gear and software do you actually need?
- Common beginner mistakes and how to fix them
- Our perspective on commercial photography and marketing outcomes
- Professional photography and marketing services from Idea Stream Marketing
- Sources
- FAQ
What is commercial photography, and what are its main types?
Commercial photography covers a wide range of specialties, and knowing which type fits your goal saves time and budget. Here’s a breakdown of the primary niches, what they deliver, and who benefits most from each.
- Product/pack shot: Clean, isolated images of a product against a neutral background. Delivers multiple angles, detail crops, and white-background masters. Buyer benefit: product clarity for listings and catalogs.
- Lifestyle: Products or services shown in real-world contexts with people or environments. Delivers aspirational hero images and social-ready crops. Buyer benefit: emotional connection that drives conversion.
- Advertising/campaign: Concept-driven images built around a specific marketing message. Delivers hero images, supporting assets, and retouched composites. Buyer benefit: consistent visual language across a campaign.
- Food and beverage: Styled dishes, drinks, and ingredients shot for menus, packaging, and editorial. Delivers hero plates, detail textures, and process shots. Buyer benefit: appetite appeal that increases order value.
- Fashion and apparel: On-model and ghost mannequin images for clothing and accessories. Delivers front, back, and detail angles for every SKU. Buyer benefit: fit and fabric clarity that reduces returns.
- Beauty and cosmetics: Close-up, high-detail images of skin, makeup, and product textures. Delivers macro shots, before/after comparisons, and campaign portraits. Buyer benefit: trust in product performance.
- Architectural and interior: Wide-angle and detail images of buildings, spaces, and interiors. Delivers full-room shots, vignettes, and exterior elevations. Buyer benefit: space storytelling for hospitality, real estate, and design brands.
- Real estate: Property images for listings, with consistent exposure and perspective correction. Delivers wide-angle interiors, exteriors, and aerial drone views. Buyer benefit: faster listing engagement and qualified inquiries.
- Corporate headshots and business portrait photography: Professional portraits of executives, teams, and staff. Delivers consistent backgrounds, lighting, and retouched finals. Buyer benefit: credibility and brand cohesion across LinkedIn, websites, and press.
- Industrial and technical: Documentation of machinery, processes, and facilities. Delivers wide-context and close-detail images for catalogs and safety materials. Buyer benefit: clear communication for B2B buyers and compliance teams.
- Group and collection: Multiple products or people arranged together. Delivers catalog spreads and family/range shots. Buyer benefit: cross-sell visibility.
- Flat lays: Overhead arrangements of products, props, and surfaces. Delivers social-ready square and portrait crops. Buyer benefit: versatile, low-cost lifestyle feel without models.
- Detail and macro: Extreme close-ups of textures, materials, and finishes. Delivers supporting images that reinforce quality claims. Buyer benefit: tactile confidence for online shoppers.
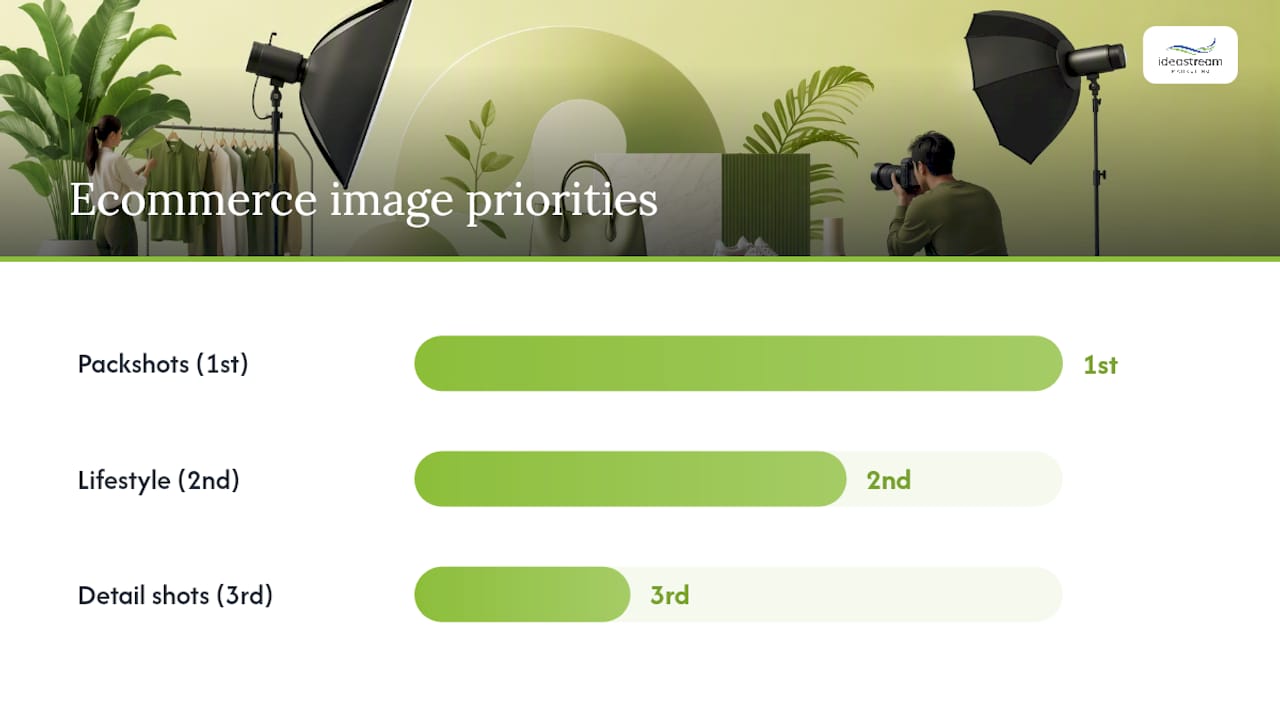
For small e-commerce brands, prioritize pack shots first, lifestyle second, and detail shots third. Pack shots establish product clarity and meet marketplace requirements. Lifestyle images lift conversion by showing the product in use. Detail shots answer the tactile questions shoppers can’t answer by touching the product. Add campaign and flat-lay imagery once your core catalog is covered.
How do businesses actually use commercial images?
The channel determines the spec. A hero image that works beautifully on a website will be rejected by a print vendor if it’s only 72 DPI, and a square Instagram crop won’t fill a billboard. Planning deliverables by channel before the shoot prevents expensive re-shoots.
Packshot, detail, infographicpure white background, sRGB
ChannelRecommended image typesCommon specsProduct page (e-commerce)Pack shot, detailsRGB, JPEGPaid social (Instagram/Facebook)Lifestyle, flat lay, campaignsRGBEmail marketingLifestyle, pack shot, seasonal72 DPI, JPEG or PNGPackaging and labelsDetail, macro, product300 DPI minimum, CMYK, TIFF or PDFOOH and print (billboards, magazines)Campaign, architectural, lifestyle300 DPI at final size, CMYK, TIFFMarketplace listings (Amazon, etc.)
Pro Tip: Shoot for your most demanding channel first. If print is in scope, capture at full resolution and color-manage to Adobe RGB — you can always downsize for web, but you can’t up-size a 72 DPI file for a magazine spread.
Visual consistency across channels matters as much as individual image quality. When your product page, email, and paid social all use the same lighting style, color palette, and scale, brand recognition compounds. Build asset versioning into your shot list from day one: plan alternate crops, horizontal and vertical orientations, and clean-background variants of every lifestyle image so your team can run A/B tests and resize for new ad placements without returning to the studio.
How do you break into commercial photography as a beginner?
Three routes work reliably, and the fastest photographers combine all three rather than waiting for one to pay off.
- Assist or second-shoot for working photographers. Contact established commercial photographers in your city and offer to assist on set. You’ll learn lighting rigs, tethering workflows, client communication, and set etiquette faster than any course can teach. Most assistants move to first-shooter status within 12–18 months of consistent work.
- Build a niche portfolio through spec projects. Pick one category — product, food, or headshots — and create three to five polished images as if you had a real client. Shoot a local restaurant’s signature dish, photograph a friend’s product line, or organize a headshot day for a small business. These images become your portfolio before you have paying clients.
- Reach out directly to small brands and retailers. A boutique clothing store, a local food brand, or a startup with weak product images is a realistic first client. Offer a small, scoped project at a modest rate in exchange for a proper brief, a signed contract, and permission to use the images in your portfolio.
A practical 6–12 month roadmap:
- Months 1–2: Complete two to three spec shoots in your chosen niche. Set up a simple portfolio site using a platform like Squarespace or Format.
- Months 3–4: Assist on at least two professional shoots. Learn tethering with Capture One or Adobe Lightroom. Draft a basic contract template.
- Months 5–6: Land your first paid project, however small. Charge a real rate, issue an invoice, and deliver with a signed usage license.
- Months 7–9: Repeat clients and referrals begin. Start tracking your cost of doing business (CODB) so you can raise rates with confidence.
- Months 10–12: Refine your niche, update your portfolio, and begin targeting mid-size brands with a proper pitch deck.
Core skills to develop in parallel: lighting modifiers and set control, tethering and live-view client approvals, basic retouching in Adobe Photoshop, client communication and briefing, contract and licensing basics, and production time management.
Pro Tip: Trade shoots for portfolio work only under clear rules. Agree in writing on the exact deliverables, the usage you retain for self-promotion, and a firm end date after which all work is paid. One or two barter projects are a portfolio investment; an open-ended pattern of free work is just under-pricing with extra steps. Fstoppers’ guide on becoming a commercial photographer is direct on this point.
What should your commercial photography portfolio include?
Your portfolio is a sales tool, not a gallery. Every image and every page should answer one question for the prospective client: “Can this photographer deliver what I need?”
Portfolio checklist:
- Hero images: Three to five of your strongest images per niche, shown large and without clutter.
- Category galleries: Separate galleries by type (product, lifestyle, food, headshots) so clients find relevant work immediately.
- Short case studies: For two or three projects, include a one-paragraph summary of the client’s goal, your approach, and the result (e.g., “Packshot series for a skincare brand launching on Amazon — 12 SKUs, white background and lifestyle variants, delivered in five business days”).
- Client list: Include brand names when you have permission. Even small or local brands add credibility.
- Contact and booking path: Make it one click from any page. Include a downloadable creative brief template so serious clients arrive prepared.
Recommended site structure: Home (hero images and a one-line positioning statement) → Portfolio by niche → About (your background and approach, not your gear list) → Services with a pricing hint → Contact with a brief download link.
Dos and don’ts:
- Show crop variety and context, not just technically perfect single images.
- Include before/after retouching examples where usage rights allow.
- Avoid purely technical show-reels with no business context — clients want to see outcomes, not camera settings.
- If you have licensing history (images used in national campaigns, retail packaging, or broadcast), note it briefly. It signals that brands trust your work at scale.
How do you prepare for a commercial shoot?
The PPA emphasizes that commercial photography is as much about client communication and production workflows as it is about making strong images. A thorough pre-production process is what separates a smooth shoot from a costly one.
Discovery call questions to ask every client:
- Who is your target audience, and where will these images appear?
- What channels and formats do you need (web, print, social, packaging)?
- What is the intended usage duration and territory?
- What is your timeline and budget range?
- Do you have brand guidelines, existing assets, or reference images?
- Who approves images on your team, and how many rounds of revisions are included?
Moodboard and shot list workflow:
- Build a moodboard in Milanote or Pinterest with 10–15 reference images that reflect the desired mood, lighting, and styling.
- Write a shot list that specifies every image: subject, angle, orientation, props, and any required copy space for text overlays.
- Plan hero shots, supporting images, and detail crops separately. A typical e-commerce shoot might include 3 hero shots, 8 supporting angles, and 4 detail crops per product.
Logistics checklist:
- Location permits (required for public spaces, commercial buildings, and some parks)
- Model and property releases (signed before the shoot, not after)
- Production hires: stylist, hair/makeup, prop stylist, retoucher
- Props, surfaces, and craft services
- Transport, parking, and load-in schedule
- Call sheet distributed to all crew 48 hours before shoot day
Pro Tip: Build a contingency plan into every shoot. Identify a backup indoor location if weather is a factor, pack a spare camera body and key lenses, and add 30 minutes of buffer to every major lighting setup. The shoots that go smoothly are the ones where someone planned for the ones that don’t.
What does a well-run shoot day look like?
Structure makes the difference between a shoot that wraps on time and one that bleeds into overtime charges. Here’s a sample timeline for a standard commercial half-day (four hours) and full-day (eight hours):
Half-day (4 hours):
- 7:00 AM — Crew call, equipment load-in, and studio setup.
- 7:30 AM — Lighting pre-rig for first setup; tethering connected and tested.
- 8:00 AM — Talent/model arrival; hair and makeup begins.
- 8:45 AM — Test shots and client approval of first setup via tethered preview.
- 9:00 AM — Hero shots, first setup (allow 45–60 minutes per major setup).
- 10:00 AM — Transition to second setup; stylist refreshes props and wardrobe.
- 10:30 AM — Supporting images and detail shots.
- 11:00 AM — Final selects review with client on-set; wrap and strike.
Full-day (8 hours): Follow the same structure with two to three additional setups, a 30-minute lunch break, and a dedicated end-of-day selects review.
Set roles and etiquette:
- Photographer: Leads creative decisions; communicates directly with the client representative.
- First assistant: Manages lighting adjustments, tethering, and gear.
- Stylist: Owns product, prop, and wardrobe presentation; calls holds when something needs adjustment.
- Talent liaison: Keeps models comfortable, on schedule, and briefed on each shot.
- Retoucher (on-set or remote): Reviews tethered selects and flags any issues before the setup is struck.
Pro Tip: When working with non-professional talent, give clear, specific direction (“turn your chin slightly left and relax your shoulders”) rather than vague encouragement. Short rehearsals before the camera rolls reduce stiffness. A relaxed pace and genuine conversation between setups produce more authentic expressions than any posing formula.
What happens after the shoot? Post-production and delivery
A clean post-production workflow protects your reputation and your client’s assets. Work through these steps in order.
Post-production steps:
- Culling: Select the best frames from each setup using star ratings in Lightroom or Capture One. Aim to deliver 10–20% of total frames captured.
- Color correction: Apply a consistent base grade across all selects. Match color temperature and exposure across setups shot under different light.
- Retouching: Skin, product surface, and background cleanup in Adobe Photoshop. Agree on retouching scope in the contract before the shoot.
- Compositing: For product shots requiring background replacement or multi-image composites, work in layered PSD files and retain all layers.
- Export presets: Prepare separate export presets for web (JPEG, sRGB, 72–96 DPI), print (TIFF, CMYK or Adobe RGB, 300 DPI), and production masters (PSD or TIFF, full resolution).
- Proofing rounds: Deliver a low-resolution proof gallery (password-protected) for client review. Limit revision rounds to what the contract specifies — typically two.
Delivery formats and naming conventions:
- Name files consistently:
ClientName_ProjectCode_ImageNumber_Version.ext(e.g.,AcmeCo_SS26_001_WEB.jpg). - Deliver web-optimized JPEGs, print-ready TIFFs, and layered PSDs as separate folders.
- Include a usage documentation sheet with each delivery: license terms, territory, duration, and permitted media.
Losing masters is a serious liability in commercial licensing disputes, particularly when a client later wants to extend usage rights.
How do you price commercial photography, and what does licensing cost?
Pricing commercial work correctly is one of the most important skills you’ll develop, and most beginners get it wrong in the same direction: too low, with licensing bundled in for free.
The three-layer pricing model
Every commercial quote should have three separate components:
- Creative fee: Your day rate or half-day rate for your time, skill, and creative direction on set.
- Production costs: All hard costs passed through to the client — studio rental, assistants, stylists, props, equipment rental, travel, and permits.
- Usage/licensing fee: The fee for the right to use the images in specific media, for a defined territory and duration.
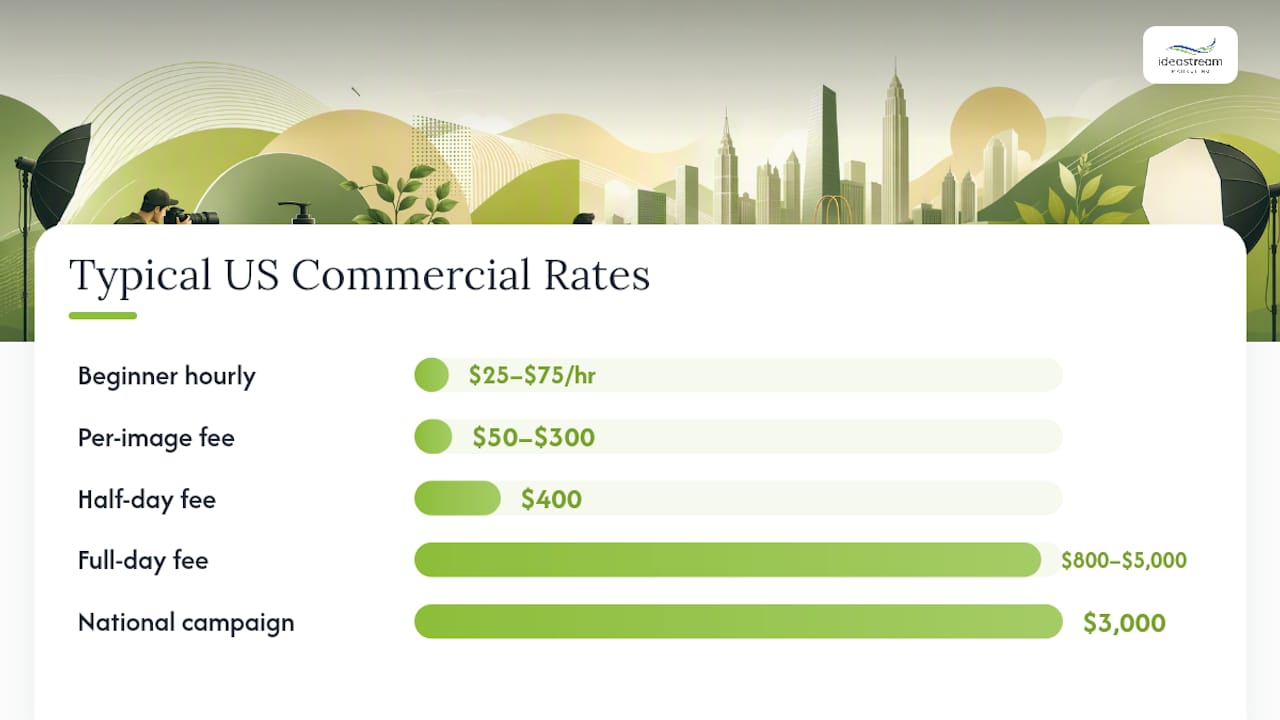
According to Photography Launchpad’s pricing guide, US beginner rates typically run $25–$75 per hour, while commercial day rates for the creative fee commonly fall between $800 and $5,000, with usage fees charged separately on top. Your starting point for any rate should be a CODB calculation: add up your annual business expenses (gear, software, insurance, marketing, studio costs), divide by your billable days, then add your target salary and a profit margin. That number is your floor, not your ceiling.
Typical US commercial photography rate ranges:
Rate typeTypical US rangeNotesBeginner hourly$25–$75/hrPre-CODB floor; raise as repeat clients appearHalf-day creative fee$4004-hour shoot, excludes production and licensingFull-day creative fee$800–$5,0008-hour shoot, excludes production and licensingPer-image product fee$50–$300/imageCommon for pack shot-only projectsNational campaign day rate$3,000Major brands; usage fees often match or exceed creative fee
Usage and licensing checklist. Every license should specify:
- Territory: U.S. only, North America, worldwide
- Duration: 6 months, 1 year, 3 years, perpetual
- Media types: Digital, print, broadcast, OOH, packaging, social
- Exclusivity: Exclusive to one brand, or non-exclusive
- sub-licensing rights: Can the client license the images to a third party?
LegalClarity notes that commercial use requires model releases, property releases, and written license agreements — and that copyright stays with the photographer unless a written assignment explicitly transfers it.
Never bundle licensing into your creative fee. Giving away unlimited usage to win a job can be a six-figure mistake on a national campaign. A brand that runs your image on national TV, outdoor boards, and digital for three years is generating significant revenue from that image — your licensing fee should reflect that value. Use the ASMP pricing resources and usage calculators to benchmark licensing fees before you quote any campaign work.
For large or multi-territory campaigns, consult an agent or use the ASMP and AOP calculators. The Professional Photographers of America (PPA) also provides workflow and pricing guidance specifically for commercial photographers navigating their first major client relationships.
Essential contract terms to include: scope of work and image count, shoot date and delivery timeline, payment schedule and kill fee, retouching scope and revision rounds, usage license terms (all five variables above), model and property release obligations, portfolio usage rights for the photographer, and dispute resolution clause.
What gear and software do you actually need?
Gear matters less than light and color management. A mid-range camera with a reliable strobe and a color-calibrated monitor will outperform a flagship body used with inconsistent light and an uncalibrated screen.
Starter kit (under $3,000 total investment):
- Camera body: Sony a7 III, Canon R6, or Nikon Z6 II (all capable of professional commercial work)
- Lenses: 24–70mm f/2.8 for versatility; 50mm or 85mm prime for portraits and pack shots
- Lighting: Two Godox AD200 Pro strobes with a softbox and a reflector
- Tripod: Manfrotto 190 series or equivalent
- Tethering: Tether Tools cable and a laptop running Capture One or Lightroom
Mid-level additions ($3,000–$8,000 range):
- Macro lens (100mm f/2.8) for detail and beauty work
- Additional modifiers: beauty dish, strip softbox, V-flat foam boards
- Color-calibrated monitor: BenQ SW series or Eizo ColorEdge
- Tethering upgrade: CamRanger 2 for wireless client preview
When to rent instead of buy:
- Large-format strobes (Profoto B10X, Broncolor) for studio shoots: rent per job until volume justifies ownership.
- Specialty lenses (tilt-shift, ultra-wide) used rarely: renting is almost always cheaper.
- Studio space: rent a local studio by the day rather than signing a lease until you have consistent monthly bookings.
Software essentials: Adobe Lightroom Classic and Photoshop (via Creative Cloud), Capture One for tethering and color, and a color profiling tool like X-Rite i1Display Pro to calibrate your monitor.
Pro Tip: Invest in reliable light before you invest in a better camera body. A well-lit image from a mid-range camera consistently outperforms a poorly lit image from the best body on the market. Color management is the second priority: if your monitor isn’t calibrated, your retouching decisions are guesses.
Common beginner mistakes and how to fix them
Most early-career errors cluster around pricing, paperwork, and color. Here’s what to watch for and what to do instead.
- under-pricing and giving away licensing. The fix: calculate your CODB before quoting any job, and always present licensing as a separate line item. Fstoppers is direct that giving away usage rights to win a job is a career-limiting pattern.
- Skipping contracts. The fix: use a written contract on every job, regardless of size. A one-page agreement covering scope, payment, and usage is better than a handshake with a brand you trust.
- Poor color management. The fix: calibrate your monitor with a hardware profiler (X-Rite or Datacolor Spyder) and deliver files in the correct color profile for each channel (sRGB for web, Adobe RGB or CMYK for print).
- Weak or missing briefs. The fix: send clients a one-page brief template before every discovery call. A client who arrives with goals, channels, and references saves two hours of back-and-forth and produces better images.
- Handing over copyright inadvertently. The fix: understand that copyright stays with you unless a written work-for-hire agreement or copyright assignment says otherwise. Review every contract for language that transfers ownership without a separate fee.
Pro Tip: Scope every job with a clear image count and explicit usage terms before you quote. “Product photography for your website” is not a scope — “12 pack shots, white background, web use only, U.S. territory, 12 months” is. Vague scopes lead to scope creep, undercharging, and client disputes.
Our perspective on commercial photography and marketing outcomes
Commercial photography doesn’t exist in isolation. The images that perform best are the ones built into a broader marketing strategy from the start — where the photographer understands the channel, the audience, and the conversion goal before the first light is set.
At Idea Stream Marketing, we see this play out consistently. When we work with clients on brand photography and visual content, the projects that generate the strongest results are the ones where photography, video, and distribution are planned together. A product hero image shot for a paid social campaign performs differently when it’s also optimized for the product page, the email sequence, and the re-targeting ad — same asset, compounded value.
The commercial photography market continues to grow, and studios that treat photography as part of a wider marketing funnel see compounded value from licensing and distribution. That’s the model we build around: every image should have a job to do, a channel to live in, and a metric to move.
Professional photography and marketing services from Idea Stream Marketing
Strong images need the right distribution to perform. Idea Stream Marketing delivers both: professional commercial photography, product and lifestyle shoots, post-production retouching, and the digital marketing infrastructure to put those images in front of the right audience.
We serve businesses throughout Long Island, New York City, and nationwide on a project or retainer basis. Our team handles everything from the initial discovery call and creative brief through shoot day, post-production, and asset distribution across paid social, SEO, and email. Whether you need a packshot series for an e-commerce launch, corporate headshots for a growing team, or a full campaign with video and photography combined, we build it around your marketing goals, not just your shot list.
Ready to get a production estimate? Contact our team to schedule a discovery call and we’ll put together a scope that fits your timeline and budget.
Sources
These resources are worth bookmarking whether you’re pricing your first commercial job or evaluating a photographer’s quote.
- How to Become a Commercial Photographer
- Photography Pricing Guide 2026: Rates, Models & CODB
- What Is Considered Commercial Photography: Types and Rights – LegalClarity
- Types of commercial photography and when e-commerce brands should use them
For large national or multi-territory campaigns, consult an agent or use the ASMP and AOP usage calculators before quoting. The financial stakes on major campaigns make professional guidance worth the cost.
FAQ
What is considered commercial photography?
Commercial photography is any image created to market, promote, or sell a product, service, or brand. It includes pack shots, lifestyle images, advertising campaigns, food photography, fashion, headshots, and architectural images — any photo made with a business outcome in mind rather than personal or editorial use.
How much do commercial photographers get paid?
U.S. commercial photographers typically charge a creative fee per day, varying widely by experience and client tier, with usage and licensing fees added on top. Beginners commonly start at modest hourly rates, with rates rising as a niche portfolio and repeat clients develop.
How do you become a commercial photographer?
Start by building a focused portfolio in one niche through spec projects, then assist working photographers to learn set workflows and client communication. Land your first paid job with a proper contract and usage license, then raise rates as repeat clients and referrals follow.
Is $100 an hour good for a photographer?
For commercial work, $100 per hour is on the lower end of a mid-level rate and reasonable for photographers with a solid portfolio and a defined niche. The more important question is whether that rate covers your CODB, target salary, and a separate usage fee — if licensing is bundled in, $100 per hour can quickly become under-pricing on any job with significant distribution.
Do I need a contract for every commercial shoot?
Yes. A written contract on every job protects both the photographer and the client by defining scope, image count, usage terms, payment schedule, and copyright ownership. Copyright stays with the photographer unless a written assignment explicitly transfers it, so contracts are the primary tool for managing rights on both sides.

